Monday, December 30, 2013

Nativity Manger

I got a miter saw and a nativity set for Christmas. Before I set start packing up decorations I wanted to make a manger so it is ready to go. I went to check out my wood supply and found some 1x3's, a piece of 1/4 inch plywood, and some wood shims.

I started off by making a frame. I cut the wood at 15 degree angles because I liked the slope. I assembled using some nails and wood glue. I attached the whole frame to the plywood.
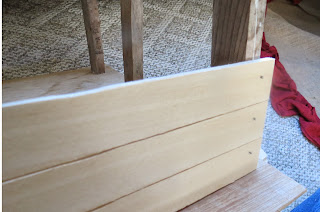
 I attached the shims to be like the siding of the stable. I just put down some wood glue and then laid the shims down. I used my nail gun to hold them in place until the glue dries.
 I used some left over brown paint to coat the entire thing. If I had better wood to use I would have stained it instead of painting. I love the way it turned out.
Next Christmas I will probably put in some sort of lighting. Right now they are kind of in the dark. Ill also get a little bit of hay to make it feel more real. Now I wont have to make it next year at the start of the busy Christmas season.

-Karen

Friday, December 27, 2013

Log Slice Clock

We needed a clock in our living room. Not having a clock just wasn't working for me. I know most people have their phones with them constantly but mine is almost always laying over on the window sill. Lucky for me my mom gave me an old clock that she hated to tear apart. If you don't have the clock mechanism you can buy them for a few bucks online or in some craft stores. I also picked up an oval log slice.


Now if you have good handwriting and can keep things consistently sized you may not need the next step. I went on the computer and printed out 1 through 12 in a font and size I liked. I also printed off a paper with lines rotated 30 degrees. I used this to help place the numbers in the correct spot. You could use a protractor instead if you would like. Be sure to mark your center.


I then traced the numbers onto the wood slice.


I used my wood burner to put all the numbers on to the wood. I also had to drill a hole into the center for the clock dial to go through.


After this was complete I put a few coats of polyurethane over the entire thing to seal the wood.


Then all that is left is to install the clock dial and hang it on the wall.

- Karen

Thursday, December 26, 2013

Log Deer

My sister requested I make her a log deer for Christmas. She had collected some rubbings from the woods and asked that I some how use them. In addition to those I had to go to the log pile and find a skinny log about 5 to 6 inches in diameter and 15 inches long. I also had to find a tiny little log. It is about 2.5 inches in diameter and 6 inches long.


Once you have all your cut pieces off wood you need to start drilling holes. Four in the bottom of the log for the legs and one on the top for the neck. I used a 1 inch spade bit because my sticks were all very close to an inch. If your sicks are an odd size you may need to whittle down the end.


You will also need to drill one hole into the head for the neck and 2 small holes for the antlers. Once all the holes are set you are ready to assemble. Using some wood glue attach the legs, then neck, the antlers.


Let the glue dry for 24 hours before handling the log deer.


- Karen


Tuesday, December 24, 2013

Tree Skirt

I love Christmas time. Spending time with family, making cookies, getting a tree, celebrating my faith. All of it makes me happy..

This year I decided to make my tree skirt based off of Uncommon Designs tutorial.  I love how it turned out so I just had to share it.


I used red wire burlap on the bottom instead of their recommendation. Other than that it is basically the same. Quick, easy, and so pretty.

-Karen

Monday, December 23, 2013

Borax Snowflake Ornaments

I am sure that most people have seen the borax snowflakes you can make. If not Google it and you will find many instructions. Well I don't do matchy-matchy Christmas trees. To me that takes away the fun. I like the separate ornaments that were given to me by someone or that remind me of a specific time. It brings back so many good memories.


That being said... The tree we got this year was slightly bigger then last year. I need a few more ornaments to fill in some of the bare spots. I had both borax and pipe cleaners so I decided to make some snowflakes. Once the crystals formed I simply hot glued on a cheap ornament hook.


That's it. I had some "filler" ornaments on the cheap.

- Karen

Sunday, December 22, 2013

Peppermint Bark

Peppermint bark is one of those things I make every Christmas. It is supper simple, tasty, and looks nice sitting out for visitors.

It is simple. First melt 12 ounces of milk, semi-sweet, or dark chocolate. It is just a matter of preference on which type you use. I usually use semi-sweet. Follow melting instructions on the chocolate. It can either be done in a double boiler or slowly in the microwave. Never melt it directly on the stove.


Once the chocolate is melted remove it from the heat. Mix in 1/4 teaspoon of peppermint extract.

Then pour the chocolate out into a pan and let it start to set up. Letting it set up the right amount of time is the hardest part of making the bark. If it sets to long the next layer of chocolate wont bond well. If it doesn't set up long enough the two chocolate layers will just mix together.

Then you basically repeat the process with your while chocolate. You spread the white chocolate right over the previous layer.


Immediately sprinkle smashed candy cased on top. I usually use 8 or so.


Let the chocolate harden and then break into pieces.


- Karen